Your support helps keep this blog running! Secure payments via Paypal and Stripe.
Last month, I got my request from my client to create the products list widget to load more features on their Woocommerce website. The widget needs to match the theme design. Plus, the widget needs to be used via the Elementor panel. Let’s do it.
In this tutorial, we will create our Elementor widget via a plugin. If you want to learn how to create your own plugin with OOP, check out my post here.
Also, in this tutorial, I will use the developer doc from Elementor for our guidelines.
Building three Elementor widgets
We will create three Elementor widgets which are the featured products list, top sale products list, and new products list.
Our plugin structure
At the end of this tutorial, we will have the plugin structure as below.
quo-elementor-add-on folder
|- quo-elementor-add-on.php
|- assets folder
||- featured-loadmore.js
||- newprod-loadmore.js
||- topsale-loadmore.js
||- style.css
|- classes folder
||- ajax_load_more.php
|- languages folder
|- widgets folder
||- quo-featured-widget.php
||- quo-newprod-widget.php
||- quo-topsale-widget.php
|- readme.txt (optional)
The readme.txt is optional. I normally create the readme.txt when I create the custom plugin for my client. So I will add the purpose of the widget, what the idea is behind and what references I use.
Create a plugin folder and main plugin file
First, we will create our plugin folder under the plugins folder in WordPress files. Then we create the main plugin file under our plugin folder. Both folder name and main plugin filename will be the same name.
Plugin folder name: quo-elementor-add-on
Main plugin filename: quo-elementor-add-on.php
Text Domain
If you need to add the translation files to the plugin, the text domain will be the same name as our plugin folder name as well.
Add code into the main plugin file
In quo-elementor-add-on.php which is our main plugin file, we will add the code following the Elementor doc. Below is our code.
<?php

namespace Quo_Elementor_Extension;


/*
Plugin Name: Elementor Widgets
Plugin URI:
Description: Products List widgets with load more button
Author: Apple Rinquest
Version: 1.0
Author URI: https://applerinquest.com/
Text Domain: quo-elementor-add-on
Domain Path: /languages/
*/

if (!defined('ABSPATH')) {
    exit; // Exit if accessed directly.
}


// # load more action with ajax
require_once(plugin_dir_path(__FILE__) . 'classes/ajax_load_more.php');


/**
 * @package Quo_Elementor_Extension
 * @author Apple Rinquest
 * @version 1.0.0
 * @see https://developers.elementor.com/creating-an-extension-for-elementor/
 */
final class Quo_Elementor_Extension
{

    const VERSION = '1.0';
    const MINIMUM_ELEMENTOR_VERSION = '2.0.0';
    const MINIMUM_PHP_VERSION = '7.0';

    private static $_instance = null;

    public static function instance()
    {
        if (is_null(self::$_instance)) {
            self::$_instance = new self();
        }
        return self::$_instance;
    }

    public function __construct()
    {
        add_action('init', [$this, 'i18n']);
        add_action('plugins_loaded', [$this, 'init']);

        // # load at frontend
        add_action('wp_enqueue_scripts', [$this, 'enqueue_scripts'], 11);
        add_action('wp_enqueue_scripts', [$this, 'register_ajax_hooks']);
    }

    public function init()
    {
        // Check if Elementor installed and activated
        if (!did_action('elementor/loaded')) {
            add_action('admin_notices', [$this, 'admin_notice_missing_main_plugin']);
            return;
        }

        // Check for required Elementor version
        if (!version_compare(ELEMENTOR_VERSION, self::MINIMUM_ELEMENTOR_VERSION, '>=')) {
            add_action('admin_notices', [$this, 'admin_notice_minimum_elementor_version']);
            return;
        }

        // Check for required PHP version
        if (version_compare(PHP_VERSION, self::MINIMUM_PHP_VERSION, '<')) {
            add_action('admin_notices', [$this, 'admin_notice_minimum_php_version']);
            return;
        }

        // Add Plugin actions
        add_action('elementor/widgets/widgets_registered', [$this, 'init_widgets']);
    }

    public function i18n()
    {
        load_plugin_textdomain('quo-elementor-add-on', false, dirname(plugin_basename(__FILE__)) . '/languages/');
    }

    public function admin_notice_missing_main_plugin()
    {
        if (isset($_GET['activate'])) unset($_GET['activate']);

        $message = sprintf(
            /* translators: 1: Plugin name 2: Elementor */
            esc_html__('"%1$s" requires "%2$s" to be installed and activated.', 'quo-elementor-add-on'),
            '<strong>' . esc_html__('Elementor', 'quo-elementor-add-on') . '</strong>'
        );

        printf('<div class="notice notice-warning is-dismissible"><p>%1$s</p></div>', $message);
    }

    public function admin_notice_minimum_elementor_version()
    {
        if (isset($_GET['activate'])) unset($_GET['activate']);

        $message = sprintf(
            /* translators: 1: Plugin name 2: Elementor 3: Required Elementor version */
            esc_html__('"%1$s" requires "%2$s" version %3$s or greater.', 'quo-elementor-add-on'),
            '<strong>' . esc_html__('Elementor', 'quo-elementor-add-on') . '</strong>',
            self::MINIMUM_ELEMENTOR_VERSION
        );

        printf('<div class="notice notice-warning is-dismissible"><p>%1$s</p></div>', $message);
    }

    public function admin_notice_minimum_php_version()
    {
        if (isset($_GET['activate'])) unset($_GET['activate']);

        $message = sprintf(
            /* translators: 1: Plugin name 2: PHP 3: Required PHP version */
            esc_html__('"%1$s" requires "%2$s" version %3$s or greater.', 'quo-elementor-add-on'),
            '<strong>' . esc_html__('PHP 7.0', 'quo-elementor-add-on') . '</strong>',
            self::MINIMUM_PHP_VERSION
        );

        printf('<div class="notice notice-warning is-dismissible"><p>%1$s</p></div>', $message);
    }

    /**
    * We will register our three widgets within init_widgets function
    */
    public function init_widgets()
    {

        // ----------------------
        // # Featured Products List widget
        // ----------------------
        // Include Widget files
        require_once(__DIR__ . '/widgets/quo-featured-widget.php');

        // Register widget
        \Elementor\Plugin::instance()->widgets_manager->register_widget_type(new \Quo_Featured_Widget());


        // ----------------------
        // # Top Sale Products List widget
        // ----------------------
        // Include Widget files
        require_once(__DIR__ . '/widgets/quo-topsale-widget.php');

        // Register widget
        \Elementor\Plugin::instance()->widgets_manager->register_widget_type(new \Quo_TopSale_Widget());


        // ----------------------
        // # New Products List widget
        // ----------------------
        // Include Widget files
        require_once(__DIR__ . '/widgets/quo-newprod-widget.php');

        // Register widget
        \Elementor\Plugin::instance()->widgets_manager->register_widget_type(new \Quo_NewProd_Widget());
    }


    /**
    * we will add stylesheet for our plugin in style.css
    */
    public function enqueue_scripts()
    {
        // style.css
        wp_register_style("quo-elementor-css", plugins_url('/assets/style.css', __FILE__), array(), false, "all");
        wp_enqueue_style("quo-elementor-css");
    }


   /**
    * we will register javascript files here.
    * for "Load More" feature, we will use ajax.
    */
    public function register_ajax_hooks()
    {
        // # use WordPress Ajax at your frontend

        // featured products
        wp_enqueue_script('quo-fp-loadmore-script', plugin_dir_url(__FILE__) . 'assets/featured-loadmore.js', array('jquery'), '1.0', true);
        wp_localize_script('quo-fp-loadmore-script', 'quo_fp_obj', array(
            'ajaxurl' => admin_url('admin-ajax.php'),
            'ajaxnonce' => wp_create_nonce('load_more_featured')
        ));


        // topsale products
        wp_enqueue_script('quo-ts-loadmore-script', plugin_dir_url(__FILE__) . 'assets/topsale-loadmore.js', array('jquery'), '1.0', true);
        wp_localize_script('quo-ts-loadmore-script', 'quo_ts_obj', array(
            'ajaxurl' => admin_url('admin-ajax.php'),
            'ajaxnonce' => wp_create_nonce('load_more_topsale')
        ));


        // new products
        wp_enqueue_script('quo-np-loadmore-script', plugin_dir_url(__FILE__) . 'assets/newprod-loadmore.js', array('jquery'), '1.0', true);
        wp_localize_script('quo-np-loadmore-script', 'quo_np_obj', array(
            'ajaxurl' => admin_url('admin-ajax.php'),
            'ajaxnonce' => wp_create_nonce('load_more_newprod')
        ));
    }
}
Quo_Elementor_Extension::instance();
Pass javascript value to PHP
In WordPress, you can pass javascript value to PHP using wp_localize_script function. Just like I use in the main plugin file above. If you would like to see my tutorial, you can visit “How to pass Javascript value to PHP in WordPress“.
Pass PHP value to javascript
In WordPress, you can pass PHP value to javascript using wp_localize_script function. If you would like to see my tutorial, you can visit “How to pass PHP value to Javascript in WordPress“.
Translation ready
For the code above, our plugin is ready for translation. Our text-domain is “quo-elementor-add-on” and the languages folder is where the translation files(.po file and .mo file) will store. If you don’t need your plugin to be translated, you can leave the code as it is.
Translate WordPress plugin
If you are interested in plugin translation, you can visit “how to translate WordPress plugin“.
Translate WordPress child theme
If you are interested in the WordPress child theme translation, you can visit “how to translate WordPress child theme“.
Load More feature using ajax
If you build a web application with PHP and you want to manipulate the data on the page without reloading your page, you will use ajax (also, you can use Vuejs instead of ajax).
In this tutorial, I will use ajax. Since WordPress code is already integrated into ajax.
Libraries in WordPress core
Create our widgets
Under quo-elementor-add-on folder, we create new folder name widgets.
A featured products widget
Under the widgets folder, we create a new quo-featured-widget.php. In this file, we create our featured products widget. The widget will show in the Elementor panel under the general section.
Add the code below in quo-featured-widget.php. You can use the guideline from the Widget Structure doc.
<?php
if (!defined('ABSPATH')) {
    exit;
} // Exit if accessed directly


/**
 * @package Quo_Featured_Widget class
 * @author Apple Rinquest
 * @version 1.0.0
 *
 */
class Quo_Featured_Widget extends \Elementor\Widget_Base
{

    public function get_name()
    {
        return 'quo-products';
    }

    public function get_title()
    {
        return __('Quo Featured Products', 'quo-elementor-add-on');
    }

    public function get_icon()
    {
        return 'fa fa-wordpress';
    }

    public function get_categories()
    {
        return ['general'];
    }

    /**
     * You must have at least one control in Elementor panel.
     * Otherwise, Advanced settings won't show any settings.
     */
    protected function _register_controls()
    {

        $this->start_controls_section(
            'content_section',
            [
                'label' => __('Content', 'quo-elementor-add-on'),
                'tab' => \Elementor\Controls_Manager::TAB_CONTENT,
            ]
        );

        $this->add_control(
            'quo-note',
            [
                'label' => __('Note', 'quo-elementor-add-on'),
                'type' => \Elementor\Controls_Manager::RAW_HTML,
                'raw' => __('You can set the number of columns for showing on each row. Also, you can set the number of rows you want "Load More" button showing each click.', 'quo-elementor-add-on'),
                'content_classes' => 'elementor-panel-alert elementor-panel-alert-info',
            ]
        );

        $this->add_control(
            'cols',
            [
                'label' => __('Columns per row', 'quo-elementor-add-on'),
                'type' => \Elementor\Controls_Manager::SELECT,
                'options' => [
                    '2' => __('2', 'quo-elementor-add-on'),
                    '3' => __('3', 'quo-elementor-add-on'),
                    '4' => __('4', 'quo-elementor-add-on'),
                ],
                'default' => '3',
            ]
        );

        $this->add_control(
            'rows',
            [
                'label' => __('Initial number of rows', 'quo-elementor-add-on'),
                'type' => \Elementor\Controls_Manager::SELECT,
                'options' => [
                    '1' => __('1', 'quo-elementor-add-on'),
                    '2' => __('2', 'quo-elementor-add-on'),
                    '3' => __('3', 'quo-elementor-add-on'),
                ],
                'default' => '2',
            ]
        );

        $this->add_control(
            'load-rows',
            [
                'label' => __('Number of rows on each loading more', 'quo-elementor-add-on'),
                'type' => \Elementor\Controls_Manager::SELECT,
                'options' => [
                    '1' => __('1', 'quo-elementor-add-on'),
                    '2' => __('2', 'quo-elementor-add-on'),
                    '3' => __('3', 'quo-elementor-add-on'),
                ],
                'default' => '1',
            ]
        );

        $this->end_controls_section();
    }

    protected function render()
    {
        // # get the settings from the Elementor controls which we create at _register_controls()
        $settings = $this->get_settings_for_display();
        $posts_per_page = $settings['cols'] * $settings['rows'];


        // # query data
        // tax_query
        $tax_query[] = array(
            'taxonomy' => 'product_visibility',
            'field'    => 'name',
            'terms'    => 'featured',  // featured product
            'operator' => 'IN', // or 'NOT IN' to exclude feature products
        );

        $args = array(
            'post_type' => 'product',
            'post_status' => 'publish',
            'offset' => 0,
            'posts_per_page' => (int)$posts_per_page,
            'orderby' => 'name',
            'order' => 'asc',
            'tax_query' => $tax_query
        );
        $query = new WP_Query($args);

        // # display data in HTML template
        if (!empty($query)) {


            // count columns per row
            $count = 1;
            // set unique number for data attribute
            $unique = 1;

            if ($query->have_posts()) {

                // # all classname will use the same as Elementor classname.
                // Basically I inspect the classname from Product category widget from Elementor Pro
                // then I use those classname in our products widget
                echo '<div class="woocommerce columns-' . $settings['cols'] . '">';
                echo '<ul id="quo-featured-prod" class="products columns-' . $settings['cols'] . '" data-cols="' . $settings['cols'] . '" data-loadRows="' . $settings['load-rows'] . '" data-rows="' . $settings['rows'] . '">';


                // # product loop
                while ($query->have_posts()) :

                    $query->the_post();

                    // # product list template
                    // note: $count and $unique are used in this template file
                    // we use the template file to make the code shorter
                    include(plugin_dir_path(__FILE__) . '/../' . 'templates/product-template.php');

                endwhile;
                wp_reset_postdata();

                echo '</ul>';
                echo '</div>';

                // # an hidden field which stores "$query->found_posts" for showing or hiding the load more button after the load more button is triggerred.
                // the found_posts is the amount of found posts from the current query.
                echo '<input type="hidden" id="total_featured_posts" name="total_featured_posts" value="' . $query->found_posts . '">';


                // # load more button
                // don't display the load more button if there is not enough post to show.

                // loading icon:
                // https://fontawesome.com/icons/spinner?style=solid
                // https://fontawesome.com/how-to-use/on-the-web/styling/animating-icons
                if ($query->found_posts > $query->post_count) {
                    echo '<div class="quo_loadMore_btn_wrapper">';
                    echo '<a id="quo-featured-prod_loadmore" class="quo_loadMore_btn button add_to_cart_button">';
                    echo '<span class="loading">' . __('loading..', 'quo-elementor-add-on') . '</span>';
                    echo '<span class="load_more">' . __('Load More', 'quo-elementor-add-on') . '</span>';
                    echo '</a>';
                    echo '</div>';
                }
            }
        }
    }
}
Explanation
- First, we block the direct access by the snippet code below.
if (!defined('ABSPATH')) {
    exit;
} // Exit if accessed directly- Next, we create our new Elementor widget by extending from Elementor widget class.
- In our widget class, we define our widget name as “quo-products” via the get_name method. The widget name must be a unique name.
- After that, we define our widget title as “Quo Featured Products” via the get_title method. The widget title will show in the Elementor panel.
- Then we define our widget icon as “fa fa-wordpress” via the get_icon method. A widget icon is optional. You can use eicon or font-awesome icons. Simply return the class name as a string.
- Next, we set our widget category as “general” via the get_categories method.
Create a new widget category
You can create your own widget category by following how to create new category.
- Then we will register our controls for our widget. First, we register the content section via the start_controls_section method. Inside our content section, we add the dropdown lists for the number of columns for one row, an initial number of rows, and how many rows will be shown for each load more trigger. In the end, we end our section with the end_controls_section method. Below shows what our controls look like in the Elementor panel.

Advanced settings section
You must have at least one control in the content section. Otherwise, in the advanced settings section where you can set margin, padding, and more, it won’t show up.
- Lastly, we will query the data we want and render the result on the page via the render method.
Getting control values within the render method
If you allow the users to change or set up any value via the controls like our tutorial, in the render method, you can access those values using the get_settings_for_display function. The function will return the result as a string array.
Now our featured products widget is registered.
What is the difference between our three widgets in this tutorial
Other widgets in this tutorial, will do the same as the featured products widget. The difference is the data query.
More useful links:
WP_Query(query product items) – https://developer.wordpress.org/reference/classes/wp_query/
get_terms(query product categories) – https://developer.wordpress.org/reference/functions/get_terms/
get product classes – https://woocommerce.github.io/code-reference/classes/WC-Product-Simple.html
WP_Query (Query Vars) – https://codex.wordpress.org/WordPress_Query_Vars
A top sale products widget
Below is a snippet of code to create the top sale products widget. You will add the code below into quo-topsale-widget.php under the widgets folder.
<?php
if (!defined('ABSPATH')) {
    exit;
} // Exit if accessed directly


/**
 * @package Quo_TopSale_Widget class
 * @author Apple Rinquest
 * @version 1.0.0
 *
 */
class Quo_TopSale_Widget extends \Elementor\Widget_Base
{

    public function get_name()
    {
        return 'quo-topsale-prod';
    }

    public function get_title()
    {
        return __('Quo TopSale Products', 'quo-elementor-add-on');
    }

    public function get_icon()
    {
        return 'fa fa-wordpress';
    }

    public function get_categories()
    {
        return ['general'];
    }

    /**
     * You must have at least one control in Elementor panel.
     * Otherwise, Advanced settings won't show any settings.
     */
    protected function _register_controls()
    {

        $this->start_controls_section(
            'content_section',
            [
                'label' => __('Content', 'quo-elementor-add-on'),
                'tab' => \Elementor\Controls_Manager::TAB_CONTENT,
            ]
        );

        $this->add_control(
            'quo-note',
            [
                'label' => __('Note', 'quo-elementor-add-on'),
                'type' => \Elementor\Controls_Manager::RAW_HTML,
                'raw' => __('You can set the number of columns for showing on each row. Also, you can set the number of rows you want "Load More" button showing each click.', 'quo-elementor-add-on'),
                'content_classes' => 'elementor-panel-alert elementor-panel-alert-info',
            ]
        );

        $this->add_control(
            'cols',
            [
                'label' => __('Columns per row', 'quo-elementor-add-on'),
                'type' => \Elementor\Controls_Manager::SELECT,
                'options' => [
                    '2' => __('2', 'quo-elementor-add-on'),
                    '3' => __('3', 'quo-elementor-add-on'),
                    '4' => __('4', 'quo-elementor-add-on'),
                ],
                'default' => '3',
            ]
        );

        $this->add_control(
            'rows',
            [
                'label' => __('Initial number of rows', 'quo-elementor-add-on'),
                'type' => \Elementor\Controls_Manager::SELECT,
                'options' => [
                    '1' => __('1', 'quo-elementor-add-on'),
                    '2' => __('2', 'quo-elementor-add-on'),
                    '3' => __('3', 'quo-elementor-add-on'),
                ],
                'default' => '2',
            ]
        );

        $this->add_control(
            'load-rows',
            [
                'label' => __('Number of rows on each loading more', 'quo-elementor-add-on'),
                'type' => \Elementor\Controls_Manager::SELECT,
                'options' => [
                    '1' => __('1', 'quo-elementor-add-on'),
                    '2' => __('2', 'quo-elementor-add-on'),
                    '3' => __('3', 'quo-elementor-add-on'),
                ],
                'default' => '1',
            ]
        );

        $this->end_controls_section();
    }

    protected function render()
    {
        // # get the settings from the Elementor controls which we create at _register_controls()
        $settings = $this->get_settings_for_display();
        $posts_per_page = $settings['cols'] * $settings['rows'];


        // # query data
        $args = array(
            'post_type' => 'product',
            'post_status' => 'publish',
            'offset' => 0,
            'posts_per_page' => (int)$posts_per_page,
            // 'orderby' => 'name',
            'order' => 'asc',
            'meta_key'      => 'total_sales',
            'orderby'       => 'meta_value_num',
        );
        $query = new WP_Query($args);

        // # display data in HTML template
        if (!empty($query)) {


            // count columns per row
            $count = 1;
            // set unique number for data attribute
            $unique = 1;

            if ($query->have_posts()) {

                // # all classname will use the same as Elementor classname.
                // Basically I inspect the classname from Product category widget from Elementor Pro
                // then I use those classname in our products widget
                echo '<div class="woocommerce columns-' . $settings['cols'] . '">';
                echo '<ul id="quo-topsale-prod" class="products columns-' . $settings['cols'] . '" data-cols="' . $settings['cols'] . '" data-loadRows="' . $settings['load-rows'] . '" data-rows="' . $settings['rows'] . '">';


                // # product loop
                while ($query->have_posts()) :

                    $query->the_post();

                    // # product list template
                    // note: $count and $unique are used in this template file
                    // we use the template file to make the code shorter
                    include(plugin_dir_path(__FILE__) . '/../' . 'templates/product-template.php');

                endwhile;
                wp_reset_postdata();

                echo '</ul>';
                echo '</div>';

                // # an hidden field which stores "$query->found_posts" for showing or hiding the load more button after the load more button is triggerred.
                // the found_posts is the amount of found posts from the current query.
                echo '<input type="hidden" id="total_topsale_posts" name="total_topsale_posts" value="' . $query->found_posts . '">';


                // # load more button
                // don't display the load more button if there is not enough post to show.

                // loading icon:
                // https://fontawesome.com/icons/spinner?style=solid
                // https://fontawesome.com/how-to-use/on-the-web/styling/animating-icons
                if ($query->found_posts > $query->post_count) {
                    echo '<div class="quo_loadMore_btn_wrapper">';
                    echo '<a id="quo-topsale-prod_loadmore" class="quo_loadMore_btn button add_to_cart_button">';
                    echo '<span class="loading">' . __('loading..', 'quo-elementor-add-on') . '</span>';
                    echo '<span class="load_more">' . __('Load More', 'quo-elementor-add-on') . '</span>';
                    echo '</a>';
                    echo '</div>';
                }
            }
        }
    }
}
A new products widget
Lastly, we will create the new product widget. You will add the snippet code below into quo-newprod-widget.php under the widgets folder.
<?php
if (!defined('ABSPATH')) {
    exit;
} // Exit if accessed directly


/**
 * @package Quo_NewProd_Widget class
 * @author Apple Rinquest
 * @version 1.0.0
 *
 */
class Quo_NewProd_Widget extends \Elementor\Widget_Base
{

    public function get_name()
    {
        return 'quo-newprod';
    }

    public function get_title()
    {
        return __('Quo New Products', 'quo-elementor-add-on');
    }

    public function get_icon()
    {
        return 'fa fa-wordpress';
    }

    public function get_categories()
    {
        return ['general'];
    }

    /**
     * You must have at least one control in Elementor panel.
     * Otherwise, Advanced settings won't show any settings.
     */
    protected function _register_controls()
    {

        $this->start_controls_section(
            'content_section',
            [
                'label' => __('Content', 'quo-elementor-add-on'),
                'tab' => \Elementor\Controls_Manager::TAB_CONTENT,
            ]
        );

        $this->add_control(
            'quo-note',
            [
                'label' => __('Note', 'quo-elementor-add-on'),
                'type' => \Elementor\Controls_Manager::RAW_HTML,
                'raw' => __('You can set the number of columns for showing on each row. Also, you can set the number of rows you want "Load More" button showing each click.', 'quo-elementor-add-on'),
                'content_classes' => 'elementor-panel-alert elementor-panel-alert-info',
            ]
        );

        $this->add_control(
            'cols',
            [
                'label' => __('Columns per row', 'quo-elementor-add-on'),
                'type' => \Elementor\Controls_Manager::SELECT,
                'options' => [
                    '2' => __('2', 'quo-elementor-add-on'),
                    '3' => __('3', 'quo-elementor-add-on'),
                    '4' => __('4', 'quo-elementor-add-on'),
                ],
                'default' => '3',
            ]
        );

        $this->add_control(
            'rows',
            [
                'label' => __('Initial number of rows', 'quo-elementor-add-on'),
                'type' => \Elementor\Controls_Manager::SELECT,
                'options' => [
                    '1' => __('1', 'quo-elementor-add-on'),
                    '2' => __('2', 'quo-elementor-add-on'),
                    '3' => __('3', 'quo-elementor-add-on'),
                ],
                'default' => '2',
            ]
        );

        $this->add_control(
            'load-rows',
            [
                'label' => __('Number of rows on each loading more', 'quo-elementor-add-on'),
                'type' => \Elementor\Controls_Manager::SELECT,
                'options' => [
                    '1' => __('1', 'quo-elementor-add-on'),
                    '2' => __('2', 'quo-elementor-add-on'),
                    '3' => __('3', 'quo-elementor-add-on'),
                ],
                'default' => '1',
            ]
        );

        $this->end_controls_section();
    }

    protected function render()
    {
        // # get the settings from the Elementor controls which we create at _register_controls()
        $settings = $this->get_settings_for_display();
        $posts_per_page = $settings['cols'] * $settings['rows'];


        // # query data
        $args = array(
            'post_type' => 'product',
            'post_status' => 'publish',
            'offset' => 0,
            'posts_per_page' => (int)$posts_per_page,
            'orderby' => 'date',
            'order' => 'asc',
        );
        $query = new WP_Query($args);

        // # display data in HTML template
        if (!empty($query)) {


            // count columns per row
            $count = 1;
            // set unique number for data attribute
            $unique = 1;

            if ($query->have_posts()) {

                // # all classname will use the same as Elementor classname.
                // Basically I inspect the classname from Product category widget from Elementor Pro
                // then I use those classname in our products widget
                echo '<div class="woocommerce columns-' . $settings['cols'] . '">';
                echo '<ul id="quo-newprod" class="products columns-' . $settings['cols'] . '" data-cols="' . $settings['cols'] . '" data-loadRows="' . $settings['load-rows'] . '" data-rows="' . $settings['rows'] . '">';


                // # product loop
                while ($query->have_posts()) :

                    $query->the_post();

                    // # product list template
                    // note: $count and $unique are used in this template file
                    // we use the template file to make the code shorter
                    include(plugin_dir_path(__FILE__) . '/../' . 'templates/product-template.php');

                endwhile;
                wp_reset_postdata();

                echo '</ul>';
                echo '</div>';

                // # an hidden field which stores "$query->found_posts" for showing or hiding the load more button after the load more button is triggerred.
                // the found_posts is the amount of found posts from the current query.
                echo '<input type="hidden" id="total_newprod_posts" name="total_newprod_posts" value="' . $query->found_posts . '">';


                // # load more button
                // don't display the load more button if there is not enough post to show.

                // loading icon:
                // https://fontawesome.com/icons/spinner?style=solid
                // https://fontawesome.com/how-to-use/on-the-web/styling/animating-icons
                if ($query->found_posts > $query->post_count) {
                    echo '<div class="quo_loadMore_btn_wrapper">';
                    echo '<a id="quo-newprod_loadmore" class="quo_loadMore_btn button add_to_cart_button">';
                    echo '<span class="loading">' . __('loading..', 'quo-elementor-add-on') . '</span>';
                    echo '<span class="load_more">' . __('Load More', 'quo-elementor-add-on') . '</span>';
                    echo '</a>';
                    echo '</div>';
                }
            }
        }
    }
}
Create our stylesheet
Next, we will create our stylesheet for our plugin.
- create an assets folder under your plugin folder
- create a new style.css under the assets folder
Below is our plugin stylesheet. You will need to change the stylesheet to match your current theme.
/* -------- Products widget STARTS ----------- */
/**
* add to cart button
*/
.woocommerce a.button.quo-add-to-cart-btn {
  color: #6a6765 !important;
  background-color: transparent !important;
  border-color: #6a6765 !important;
  font-weight: normal !important;
  text-transform: lowercase !important;
  border-style: solid !important;
  border-width: 1px 1px 1px 1px !important;
  border-radius: 0px 0px 0px 0px !important;
  padding: 16px 50px 16px 50px !important;
}
.woocommerce a.button.quo-add-to-cart-btn:hover {
  color: #d8bdb4 !important;
  background-color: #d8bdb400 !important;
  border-color: #d8bdb4 !important;
}

/**
* product grid
*/
ul.products li {
  text-align: center;
}
ul.products li .quo-price {
  color: #7a7a7a;
}

/**
* load more button
*/
.quo_loadMore_btn_wrapper {
  text-align: center;
  margin: 30px 10px 50px 10px;
}
.quo_loadMore_btn {
  color: #16163f !important;
  background-color: #d8bdb4 !important;
  border-color: #d8bdb4 !important;
  font-weight: normal;
  text-transform: lowercase;
  border-style: solid;
  border-width: 1px 1px 1px 1px;
  border-radius: 0px 0px 0px 0px;
  padding: 16px 50px 16px 50px;
  cursor: pointer;
  transition: all ease-out 0.5s;
}
.quo_loadMore_btn:hover {
  color: #d8bdb4 !important;
  background-color: transparent !important;
  border-color: #d8bdb4 !important;
}
.quo_loadMore_btn .loading {
  display: none;
}

/* -------- Products widget ENDS ----------- */
No changes on the frontend
If you change any stylesheet from the style.css but on the frontend, you don’t see the changes. Possible it is the cache issue. You need to clear your browser cache and any cache plugins you use on your website and server.
Create ajax action
Afterload more button is triggered, we use ajax to query our new data and send it back to show on the frontend.
First, we will create a new class which will be called ajax action. The class will receive the query parameters from the load more trigger and perform a new query and send the result back as JSON.
- create new classes folder under your plugin folder
- create a new ajax_load_more.php under the classes folder
- add the snippet code below into ajax_load_more.php
<?php
if (!defined('ABSPATH')) {
    exit;
} // Exit if accessed directly


class Quo_Ajax_LoadMore
{
    function __construct()
    {
        // # Ajax: use as action in $.ajax()

        // featured products
        add_action('wp_ajax_loadmore', array($this, 'ajax_featured_loadmore'));
        add_action('wp_ajax_nopriv_loadmore', array($this, 'ajax_featured_loadmore'));


        // topsale products
        add_action('wp_ajax_topsale_loadmore', array($this, 'ajax_topsale_loadmore'));
        add_action('wp_ajax_nopriv_topsale_loadmore', array($this, 'ajax_topsale_loadmore'));

        // newprod products
        add_action('wp_ajax_newprod_loadmore', array($this, 'ajax_newprod_loadmore'));
        add_action('wp_ajax_nopriv_newprod_loadmore', array($this, 'ajax_newprod_loadmore'));
    }


    /**
     * Ajax: fetch the fearured products after load more button is triggerred.
     * We render only <li>
     */
    public function ajax_featured_loadmore()
    {

        $ajax   = wp_doing_ajax();

        // # Check if there is any nonce is sent via ajax. If not, throw the error
        if (empty($_POST['nonce'])) {
            $err_msg = __('Insecure form submitted without security token. Plaese contact developer', 'quo-elementor-add-on');
            if ($ajax) {
                wp_send_json_error($err_msg);
            }
            return false;
        }

        // # Check if nonce matches what we set at Ajax call. If not, throw the error
        if (!wp_verify_nonce($_POST['nonce'], 'load_more_featured')) {
            $err_msg = __(
                'Security token did not match. Please contact developer',
                'quo-elementor-add-on'
            );
            if ($ajax) {
                wp_send_json_error($err_msg);
            }
            return false;
        }


        // assign unique number to each <li>
        $unique = (int)$_POST['unique'] + 1;

        // # perform query
        $tax_query[] = array(
            'taxonomy' => 'product_visibility',
            'field'    => 'name',
            'terms'    => 'featured',  // featured products
            'operator' => 'IN', // or 'NOT IN' to exclude feature products
        );

        $args = array(
            'post_type' => 'product',
            'post_status' => 'publish',
            'offset' => (int)$_POST['offset_start'],
            'posts_per_page' => ((int)$_POST['cols'] * (int)$_POST['loadrows']),
            'orderby' => 'name',
            'order' => 'asc',
            'tax_query' => $tax_query
        );
        $query = new \WP_Query($args);

        // # display data in HTML template
        if (!empty($query)) {
            if ($query->have_posts()) {

                $count = 1;
                ob_start();

                // # product loop
                while ($query->have_posts()) :

                    $query->the_post();

                    // # get product object: can be simple, composite(WPC composite plugin), variant and more => Canc heck at "Product Data" field at Product item at backend.
                    // https://woocommerce.github.io/code-reference/classes/WC-Product-Simple.html
                    $product = wc_get_product(get_the_ID());


                    // # get the HTML image with specific image size
                    // return as an image URL from $image[0]
                    $image = wp_get_attachment_image_src(get_post_thumbnail_id($product->get_id()), 'woocommerce_thumbnail');


                    // # get woocommerce placehodler image with specific image size
                    if (empty($image)) {
                        $image = wc_placeholder_img('woocommerce_thumbnail');
                    }


                    // # get 3 columns class which will use from Elemenetor
                    if ($count == 1) {
                        echo '<li class="product first"  data-record="' . $unique . '">';
                    } elseif ($count == (int)$_POST['cols']) { // we set to display three product category items for one row
                        $count = 0;
                        echo '<li class="product last" data-record="' . $unique . '">';
                    } else
                        echo '<li class="product" data-record="' . $unique . '">';


                    // # render HTML template
                    // product link
                    echo '<a class="woocommerce-LoopProduct-link woocommerce-loop-product__link" href="' . get_permalink($product->get_id()) . '" >';

                    // product image
                    echo '<img src="' . $image[0] . '">';

                    // Optional: Output the product sale flash.
                    // woocommerce_show_product_sale_flash($post, $product);

                    // product title
                    echo '<h2 class="woocommerce-loop-product__title">';
                    echo $product->get_title();
                    echo '</h2>';

                    // price
                    echo '<span class="quo-price">' . $product->get_price_html() . '</span>';

                    echo '</a>';

                    // # add to cart
                    // if the product is in stock and allow to purchase then show the add_to_cart button
                    if ($product->is_purchasable() && $product->is_in_stock()) {

                        // get link for add_to_cart_url()
                        $add_to_cart = $product->add_to_cart_url();

                        echo '<div>';
                        echo '<a class="button add_to_cart_button quo-add-to-cart-btn" href="' . $add_to_cart . '">' . $product->add_to_cart_text() . '</a>';
                        echo '</div>';
                    }

                    echo '</li>';


                    $count++;
                    $unique++;
                endwhile;
                wp_reset_postdata();
                ob_end_flush();
                wp_die();  // using wp_die() when ajax call
            }
        } else {
            echo __('No product found', 'quo-elementor-add-on');
            wp_die();  // using wp_die() when ajax call
        }
    }

    /**
     * Ajax: fetch the topsale products after load more button is triggerred.
     * We render only <li>
     */
    public function ajax_topsale_loadmore()
    {

        $ajax   = wp_doing_ajax();

        // # Check if there is any nonce is sent via ajax. If not, throw the error
        if (empty($_POST['nonce'])) {
            $err_msg = __('Insecure form submitted without security token. Plaese contact developer', 'quo-elementor-add-on');
            if ($ajax) {
                wp_send_json_error($err_msg);
            }
            return false;
        }

        // # Check if nonce matches what we set at Ajax call. If not, throw the error
        if (!wp_verify_nonce($_POST['nonce'], 'load_more_topsale')) {
            $err_msg = __(
                'Security token did not match. Please contact developer',
                'quo-elementor-add-on'
            );
            if ($ajax) {
                wp_send_json_error($err_msg);
            }
            return false;
        }


        // assign unique number to each <li>
        $unique = (int)$_POST['unique'] + 1;

        // # perform query
        $args = array(
            'post_type' => 'product',
            'post_status' => 'publish',
            'offset' => (int)$_POST['offset_start'],
            'posts_per_page' => ((int)$_POST['cols'] * (int)$_POST['loadrows']),
            'order' => 'asc',
            'meta_key'      => 'total_sales',
            'orderby'       => 'meta_value_num',
        );
        $query = new \WP_Query($args);

        // # display data in HTML template
        if (!empty($query)) {
            if ($query->have_posts()) {

                $count = 1;
                ob_start();

                // # product loop
                while ($query->have_posts()) :

                    $query->the_post();

                    // # get product object: can be simple, composite(WPC composite plugin), variant and more => Canc heck at "Product Data" field at Product item at backend.
                    // https://woocommerce.github.io/code-reference/classes/WC-Product-Simple.html
                    $product = wc_get_product(get_the_ID());


                    // # get the HTML image with specific image size
                    // return as an image URL from $image[0]
                    $image = wp_get_attachment_image_src(get_post_thumbnail_id($product->get_id()), 'woocommerce_thumbnail');


                    // # get woocommerce placehodler image with specific image size
                    if (empty($image)) {
                        $image = wc_placeholder_img('woocommerce_thumbnail');
                    }


                    // # get 3 columns class which will use from Elemenetor
                    if ($count == 1) {
                        echo '<li class="product first"  data-record="' . $unique . '">';
                    } elseif ($count == (int)$_POST['cols']) { // we set to display three product category items for one row
                        $count = 0;
                        echo '<li class="product last" data-record="' . $unique . '">';
                    } else
                        echo '<li class="product" data-record="' . $unique . '">';


                    // # render HTML template
                    // product link
                    echo '<a class="woocommerce-LoopProduct-link woocommerce-loop-product__link" href="' . get_permalink($product->get_id()) . '" >';

                    // product image
                    echo '<img src="' . $image[0] . '">';

                    // Optional: Output the product sale flash.
                    // woocommerce_show_product_sale_flash($post, $product);

                    // product title
                    echo '<h2 class="woocommerce-loop-product__title">';
                    echo $product->get_title();
                    echo '</h2>';

                    // price
                    echo '<span class="quo-price">' . $product->get_price_html() . '</span>';

                    echo '</a>';

                    // # add to cart
                    // if the product is in stock and allow to purchase then show the add_to_cart button
                    if ($product->is_purchasable() && $product->is_in_stock()) {

                        // get link for add_to_cart_url()
                        $add_to_cart = $product->add_to_cart_url();

                        echo '<div>';
                        echo '<a class="button add_to_cart_button quo-add-to-cart-btn" href="' . $add_to_cart . '">' . $product->add_to_cart_text() . '</a>';
                        echo '</div>';
                    }

                    echo '</li>';


                    $count++;
                    $unique++;
                endwhile;
                wp_reset_postdata();
                ob_end_flush();
                wp_die();  // using wp_die() when ajax call
            }
        } else {
            echo __('No product found', 'quo-elementor-add-on');
            wp_die();  // using wp_die() when ajax call
        }
    }


    /**
     * Ajax: fetch the newprod products after load more button is triggerred.
     * We render only <li>
     */
    public function ajax_newprod_loadmore()
    {

        $ajax   = wp_doing_ajax();

        // # Check if there is any nonce is sent via ajax. If not, throw the error
        if (empty($_POST['nonce'])) {
            $err_msg = __('Insecure form submitted without security token. Plaese contact developer', 'quo-elementor-add-on');
            if ($ajax) {
                wp_send_json_error($err_msg);
            }
            return false;
        }

        // # Check if nonce matches what we set at Ajax call. If not, throw the error
        if (!wp_verify_nonce($_POST['nonce'], 'load_more_newprod')) {
            $err_msg = __(
                'Security token did not match. Please contact developer',
                'quo-elementor-add-on'
            );
            if ($ajax) {
                wp_send_json_error($err_msg);
            }
            return false;
        }


        // assign unique number to each <li>
        $unique = (int)$_POST['unique'] + 1;

        // # perform query
        $args = array(
            'post_type' => 'product',
            'post_status' => 'publish',
            'offset' => (int)$_POST['offset_start'],
            'posts_per_page' => ((int)$_POST['cols'] * (int)$_POST['loadrows']),
            'order' => 'asc',
            'orderby' => 'date',
        );
        $query = new \WP_Query($args);

        // # display data in HTML template
        if (!empty($query)) {
            if ($query->have_posts()) {

                $count = 1;
                ob_start();

                // # product loop
                while ($query->have_posts()) :

                    $query->the_post();

                    // # get product object: can be simple, composite(WPC composite plugin), variant and more => Canc heck at "Product Data" field at Product item at backend.
                    // https://woocommerce.github.io/code-reference/classes/WC-Product-Simple.html
                    $product = wc_get_product(get_the_ID());


                    // # get the HTML image with specific image size
                    // return as an image URL from $image[0]
                    $image = wp_get_attachment_image_src(get_post_thumbnail_id($product->get_id()), 'woocommerce_thumbnail');


                    // # get woocommerce placehodler image with specific image size
                    if (empty($image)) {
                        $image = wc_placeholder_img('woocommerce_thumbnail');
                    }


                    // # get 3 columns class which will use from Elemenetor
                    if ($count == 1) {
                        echo '<li class="product first"  data-record="' . $unique . '">';
                    } elseif ($count == (int)$_POST['cols']) { // we set to display three product category items for one row
                        $count = 0;
                        echo '<li class="product last" data-record="' . $unique . '">';
                    } else
                        echo '<li class="product" data-record="' . $unique . '">';


                    // # render HTML template
                    // product link
                    echo '<a class="woocommerce-LoopProduct-link woocommerce-loop-product__link" href="' . get_permalink($product->get_id()) . '" >';

                    // product image
                    echo '<img src="' . $image[0] . '">';

                    // Optional: Output the product sale flash.
                    // woocommerce_show_product_sale_flash($post, $product);

                    // product title
                    echo '<h2 class="woocommerce-loop-product__title">';
                    echo $product->get_title();
                    echo '</h2>';

                    // price
                    echo '<span class="quo-price">' . $product->get_price_html() . '</span>';

                    echo '</a>';

                    // # add to cart
                    // if the product is in stock and allow to purchase then show the add_to_cart button
                    if ($product->is_purchasable() && $product->is_in_stock()) {

                        // get link for add_to_cart_url()
                        $add_to_cart = $product->add_to_cart_url();

                        echo '<div>';
                        echo '<a class="button add_to_cart_button quo-add-to-cart-btn" href="' . $add_to_cart . '">' . $product->add_to_cart_text() . '</a>';
                        echo '</div>';
                    }

                    echo '</li>';


                    $count++;
                    $unique++;
                endwhile;
                wp_reset_postdata();
                ob_end_flush();
                wp_die();  // using wp_die() when ajax call
            }
        } else {
            echo __('No product found', 'quo-elementor-add-on');
            wp_die();  // using wp_die() when ajax call
        }
    }
}
$Quo_Ajax_LoadMore = new Quo_Ajax_LoadMore;
Explanation
For each method in the class, we will check the nonce before processing. If the nonce is correct then we will continue. Next, we perform the query. After that, we generate the result which is the data and layout.
How many data records and columns will show when clicking on the load more button, users will set via the Elementor panel. We have already added the code in the widgets folder.
Define ajax action
In WordPress, you define the ajax action by using wp_ajax_{action} and wp_ajax_nopriv_{action}. wp_ajax_{action} is for login users while wp_ajax_nopriv_{action} is for non-login users.
Create javascript files
Next, we will create our javascript files to load more triggers.
Featured products – load more action
Create the featured-loadmore.js under the assets folder. Below is a snippet of code you will add to featured-loadmore.js.
jQuery(document).ready(function ($) {
    // # load more functionality
    quo_featuredProd_loadmore($);
});

function quo_featuredProd_loadmore($) {
    var loadMoreBtn = $('#quo-featured-prod_loadmore')

    loadMoreBtn.on('click', function (e) {
        e.preventDefault();
        // console.log('quo_featuredProd_loadmore is clicked');

        // find the offset for next query
        var offset_start = $("#quo-featured-prod li:last-child").data('record');
        var cols = $("#quo-featured-prod").data('cols');
        var loadrows = $("#quo-featured-prod").data('loadrows');

        // set data object
        var data = {
            action: 'loadmore',
            nonce: quo_fp_obj.ajaxnonce,
            offset_start: offset_start,
            cols: cols,
            loadrows: loadrows,
            unique: offset_start
        };

        // call Ajax
        $.ajax({
            url: quo_fp_obj.ajaxurl,  // Ajax handler
            type: "post",
            data: data,
            beforeSend: function (xhr) {
                // show loading text
                loadMoreBtn.find('.load_more').hide();
                loadMoreBtn.find('.loading').show();
            },
            success: function (res) {
                console.log('success');

                $('#quo-featured-prod').find("li:last-child").parent().append(res);

                // hide loading text
                loadMoreBtn.find('.load_more').show();
                loadMoreBtn.find('.loading').hide();

                if ($('#total_featured_posts').val() == $('#quo-featured-prod').find("li:last-child").data('record')) {
                    // hide load more button
                    loadMoreBtn.hide();
                }

                console.log('total=' + $('#total_featured_posts').val());
                console.log('li last child=' + $('#quo-featured-prod').find("li:last-child").data('record'));
            },
            error: function (e) {
                console.log(e);
            },

        });

    });

}
Explanation
- We will load the quo_featuredProd_loadmore function after all document is loaded on the browser.
- In the quo_featuredProd_loadmore function, if the load more button is clicked, we will send all query parameters that we set as data attributes on HTML elements to the data object.
- Then we call ajax and pass the data object to loadmore action which we already created at ajax_load_more.php
Top Sale products – load more action
Create topsale-loadmore.js under the assets folder and add the snippet code below it.
jQuery(document).ready(function ($) {
    // # load more functionality
    quo_topsale_loadmore($);
});

function quo_topsale_loadmore($) {
    var loadMoreBtn = $('#quo-topsale-prod_loadmore')

    loadMoreBtn.on('click', function (e) {
        e.preventDefault();
        // console.log('quo_topsale_loadmore is clicked');

        // find the offset for next query
        var offset_start = $("#quo-topsale-prod li:last-child").data('record');
        var cols = $("#quo-topsale-prod").data('cols');
        var loadrows = $("#quo-topsale-prod").data('loadrows');

        // set data object
        var data = {
            action: 'topsale_loadmore',
            nonce: quo_ts_obj.ajaxnonce,
            offset_start: offset_start,
            cols: cols,
            loadrows: loadrows,
            unique: offset_start
        };

        // call Ajax
        $.ajax({
            url: quo_ts_obj.ajaxurl,  // Ajax handler
            type: "post",
            data: data,
            beforeSend: function (xhr) {
                // show loading text
                loadMoreBtn.find('.load_more').hide();
                loadMoreBtn.find('.loading').show();
            },
            success: function (res) {
                console.log('success');

                $('#quo-topsale-prod').find("li:last-child").parent().append(res);

                // hide loading text
                loadMoreBtn.find('.load_more').show();
                loadMoreBtn.find('.loading').hide();

                if ($('#total_topsale_posts').val() == $('#quo-topsale-prod').find("li:last-child").data('record')) {
                    // hide load more button
                    loadMoreBtn.hide();
                }

                console.log('total=' + $('#total_topsale_posts').val());
                console.log('li last child=' + $('#quo-topsale-prod').find("li:last-child").data('record'));
            },
            error: function (e) {
                console.log(e);
            },

        });

    });

}
New products – load more action
Create newprod-loadmore.js under the assets folder and add the snippet code below it.
jQuery(document).ready(function ($) {
// # load more functionality
quo_newprod_loadmore($);
});
function quo_newprod_loadmore($) {
var loadMoreBtn = $('#quo-newprod_loadmore')
loadMoreBtn.on('click', function (e) {
e.preventDefault();
// console.log('quo_newprod_loadmore is clicked');
// find the offset for next query
var offset_start = $("#quo-newprod li:last-child").data('record');
var cols = $("#quo-newprod").data('cols');
var loadrows = $("#quo-newprod").data('loadrows');
// set data object
var data = {
action: 'newprod_loadmore',
nonce: quo_np_obj.ajaxnonce,
offset_start: offset_start,
cols: cols,
loadrows: loadrows,
unique: offset_start
};
// call Ajax
$.ajax({
url: quo_np_obj.ajaxurl, // Ajax handler
type: "post",
data: data,
beforeSend: function (xhr) {
// show loading text
loadMoreBtn.find('.load_more').hide();
loadMoreBtn.find('.loading').show();
},
success: function (res) {
console.log('success');
$('#quo-newprod').find("li:last-child").parent().append(res);
// hide loading text
loadMoreBtn.find('.load_more').show();
loadMoreBtn.find('.loading').hide();
if ($('#total_newprod_posts').val() == $('#quo-newprod').find("li:last-child").data('record')) {
// hide load more button
loadMoreBtn.hide();
}
console.log('total=' + $('#total_newprod_posts').val());
console.log('li last child=' + $('#quo-newprod').find("li:last-child").data('record'));
},
error: function (e) {
console.log(e);
},
});
});
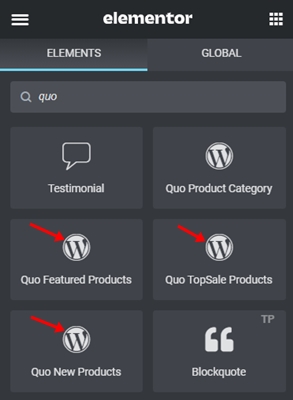
}The result
Now when you activate your plugin. In the Elementor panel, you should see your three widgets there.
Let’s say you drag and drop “Quo Featured Products” into the homepage. Then you click on that widget. You will see 3 default values below.

You save and view the homepage. You will see your three featured products showing in 3 columns for one row as below. It follows our widget settings in the panel.

When you click on the “load more” button, more products will show. It will show 6 products and it will show 3 columns for one row. It follows our featured product widget setting from the panel. Below is our result.

If no products will show, the load more button will disappear. The load more button will only show if there are more products that can be shown.
Using Shortcode
If you don’t feel comfortable with creating your own Elementor widget, you can build the same widgets in this tutorial with a shortcode instead. However, building the Elementor widget is more friendly for the end-user since the end-user can configure the widget right from the Elementor panel.
Conclusion
Elementor is a great plugin. It is easy to use for both designers and users. You can see and design the result from the same page. Plus, you can design the page for all devices from one place as well. It is very convivence.
There are many free and paid Elementor add-ons out there. However, sometimes your client requests specific widgets that you can not find from the market. That’s why Elementor provides a useful developer document for you. If you are stuck on some issues, you can ask the Elementor community.
I hope this tutorial is helpful. Please consider buying me some coffee if my time is helping your time. It keeps motivating me to share my experiences with you. 🙂
Your support helps keep this blog running! Secure payments via Paypal and Stripe.